The concurrent Program is one of the most important functionalities available in Oracle Apps. It allows users to submit jobs parallelly. These programs run in the background and asynchronous manner. You can submit multiple instances of the same program. A concurrent manager controls and manages the running of all these programs.
This is the way users interact with concurrent programs.
User submits concurrent program. The concurrent manager picks this program depending on the existing load and available resources and executes it. User views log and output post-completion of the program.
What if the program is a big report which takes a lot of time and consumes more resources?
This impacts other users and the overall Oracle ERP production environment. So, it is always better to run such programs when there is less load on the system e.g. during late night or early morning.
But, who is going to wait until late at night to submit the program? What if you can tell Oracle Apps to schedule a run of the program at midnight or early morning?
In this article, let’s see how to schedule a concurrent program in Oracle Apps. This is built-in scheduling available in Oracle Apps.
1. Go to Submit Request SRS form
The scheduling option is available when you submit a concurrent program. Navigate to respective responsibilities and open the SRS form.
In this case, navigate to System Administrator->View->Requests->Submit a New Request->Single Request and select Gather Schema Statistics program.
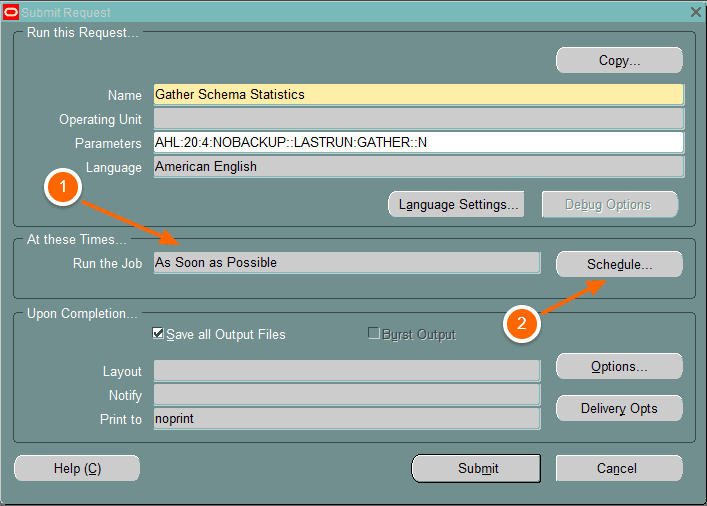
The default scheduling option is As soon as Possible. Click on the Schedule button to change it. This opens a window showing different schedule options.
2. Select Required Schedule
Oracle Apps provide different scheduling options like As Soon as Possible, Once, Periodically, On Specific Days, and Advanced.
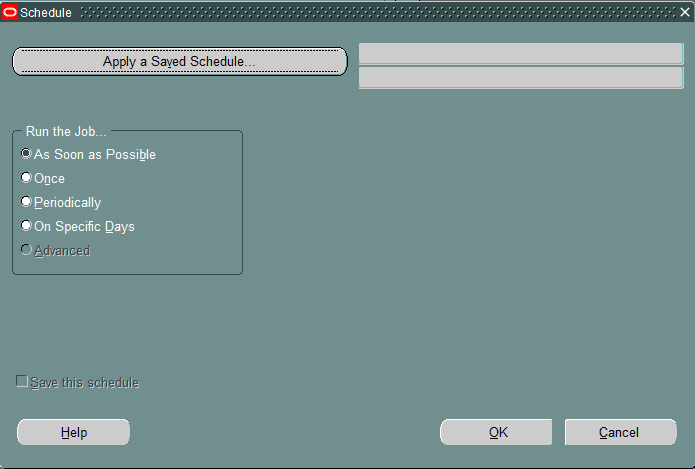
As soon as possible – This is the default option. As the name suggests, the concurrent manager starts it as soon as it has a necessary resource available like a concurrent process.
Once – This scheduling option allows you to submit the program on a specific date and time
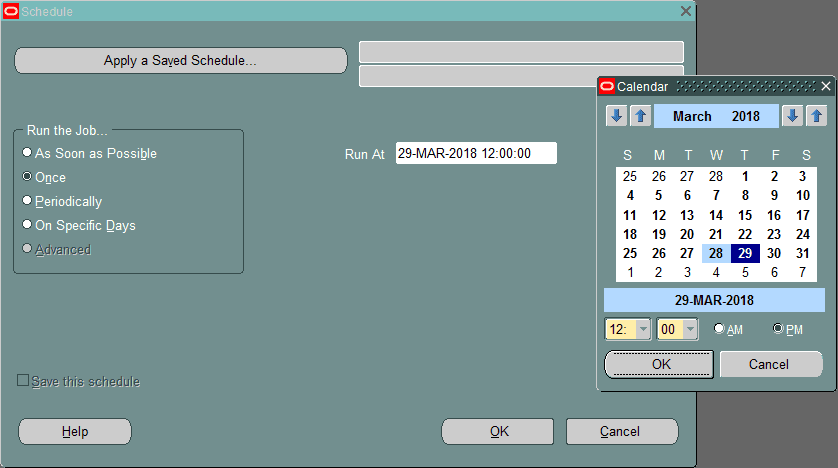
Click on Run at a box to open a calendar. Choose the date and time when the program should run. You can use the arrow to change the month and year. Mention the date in 12 hours format with AM and PM options and click OK.
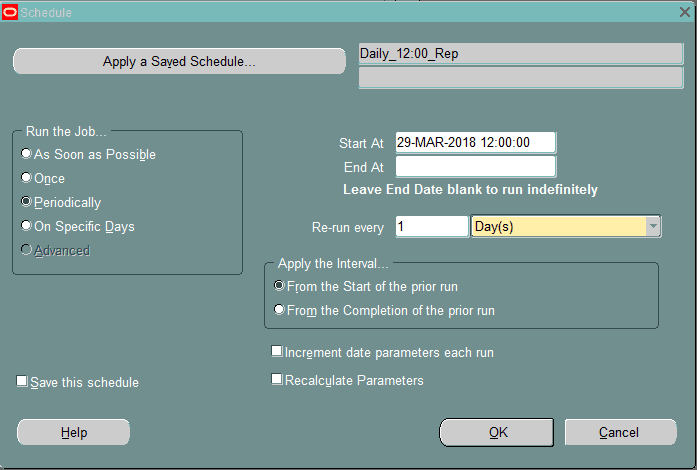
Periodically – This option allows you to schedule a concurrent program for a specific interval.
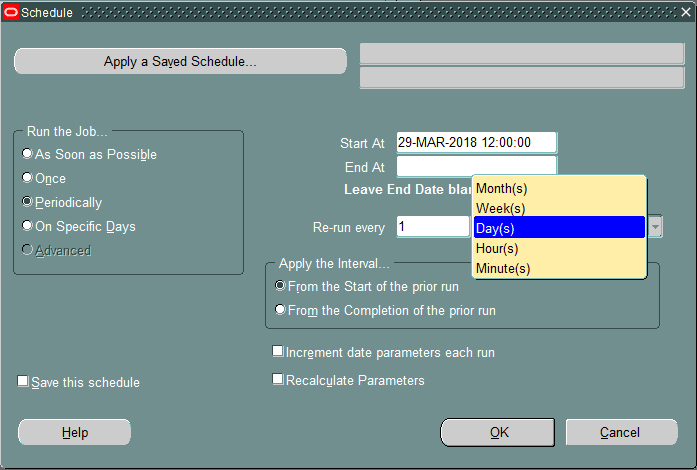
Starts At – Select when the schedule starts.
End At – Select the date and time when the schedule ends. Leaving it blank makes the schedule run indefinitely duration, till it is canceled.
Re-run every – Specify the re-run interval. options available are month(s) , Week(s) , Day(s), Hour(s) and Minute(s).
e.g Re-Run Every 1 Day(s) – this program runs each day at the specified time.
Apply the Interval…
When the next scheduled instance of the program should run?
- From the start of the prior run – Next scheduled instance run from the start of the prior run.
- From the completion of the prior run – Next scheduled instance run from the completion of the prior run.
Increment date parameter each run – This is applicable when the concurrent program has a current date parameter. When it enables the date parameter is modified to show the current date.
Recalculate parameters – This recalculates the program parameter which are default values using SQL statements and other functions.
On Specific Days – You can specify date Dates of Every month of Days of Every week the program should run
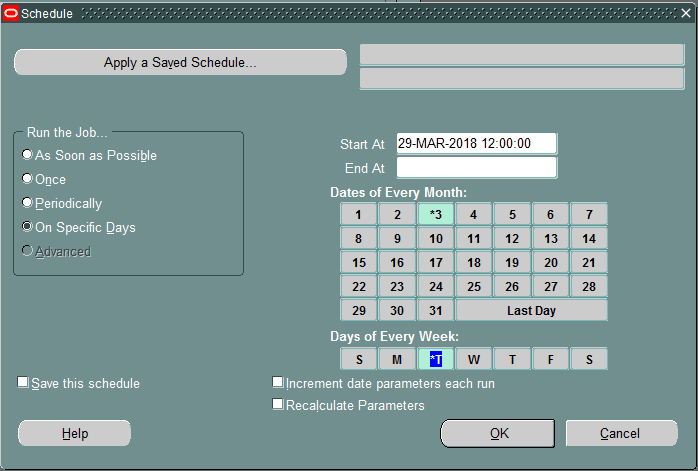
Apply a Saved Schedule – Click this button to select the existing saved schedule. It opens a LOV showing all saved schedules.
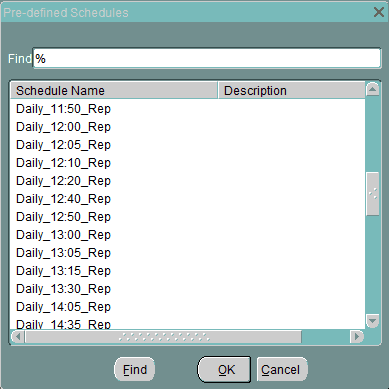
Select the one which you want and click on OK. This copies that schedule to the current concurrent program as shown below.
Save this schedule – Select this check box to save the schedule with a user-defined name. This is helpful if you want to reuse the same schedule for different concurrent programs.
3. Schedule Request ( Concurrent Program)
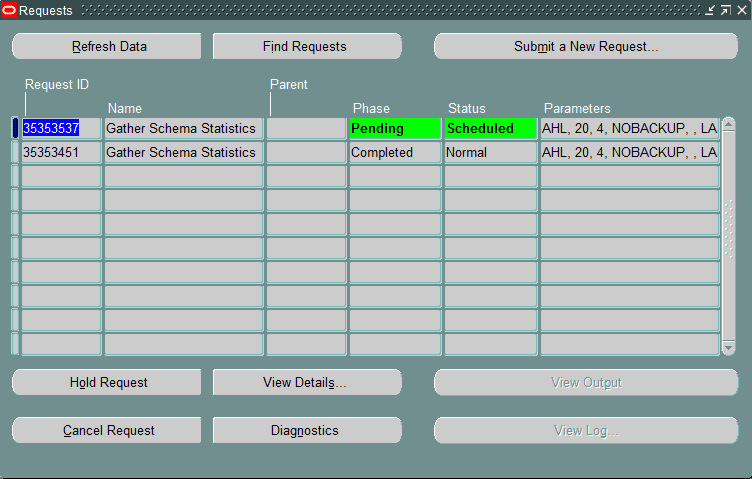
Select the option you want and click on the OK button. This submits the concurrent program. The program stays in the Pending Scheduled state till the scheduled time is reached.
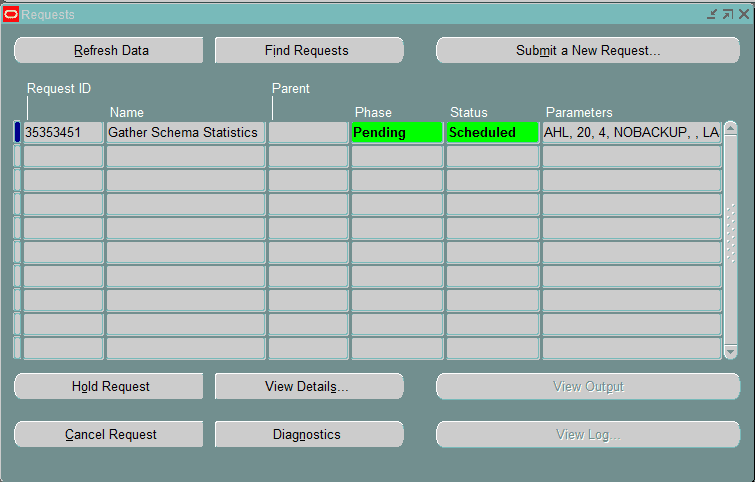
A new request(Pending Scheduled ) is submitted post-completion of the prior request.
Modify or Cancel Schedule?
Modify Schedule
Select the scheduled concurrent request (35353537) and click on the View Details… button. It opens Submit Request window. Click on the Schedule button and select the new schedule as per requirement.
Cancel Schedule
If you have mentioned the end date while defining the schedule, it ends at that specified time. In case the end date is blank and you want to cancel the schedule, just query the request and click on the Cancel Request button. This cancels the current request and all future scheduled requests.
Summary
Oracle Apps built-in scheduling mechanism provides an easy mechanism to schedule a program to run at a specific time. But if there are 100’s of programs with complex scheduling requirements, it is better to go with third-party tools like UC4 / Appworx – Automation Platform, Cisco/Tidal – Tidal, Control-M, etc.
I hope this article covers all aspect of concurrent program scheduling and you liked it. Please subscribe and share.